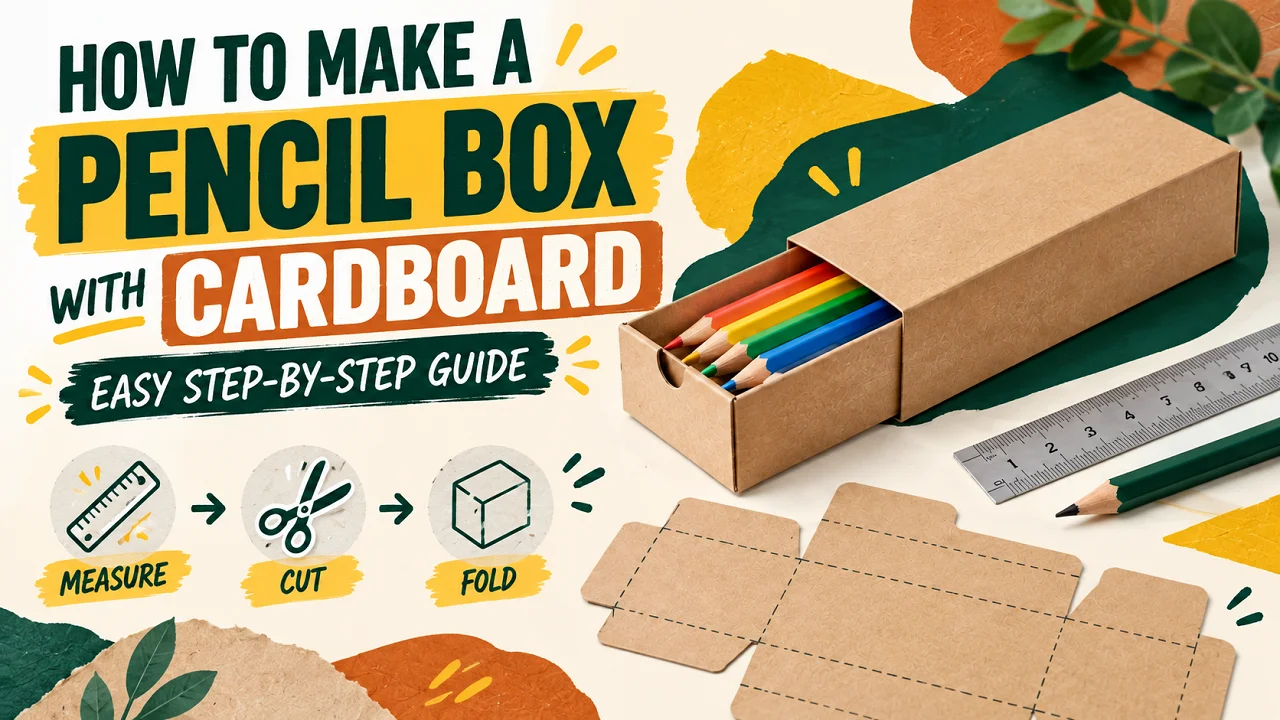
Making a pencil box from cardboard is a practical craft project for children and adults. It can turn spare cardboard into useful storage for pencils, pens and other small stationery items. You only need a few basic tools and a simple plan. Follow this guide to measure, cut and assemble a cardboard pencil box with a neat sliding drawer.
Quick answer: To make a pencil box with cardboard, cut pieces for the base, sides and outer sleeve. Join the base pieces with craft glue. Fold and glue the sleeve around the finished tray. Allow the adhesive to dry before adding pencils. An internal length of about 21 cm will fit most standard pencils.
What Type of Pencil Box Will We Make?
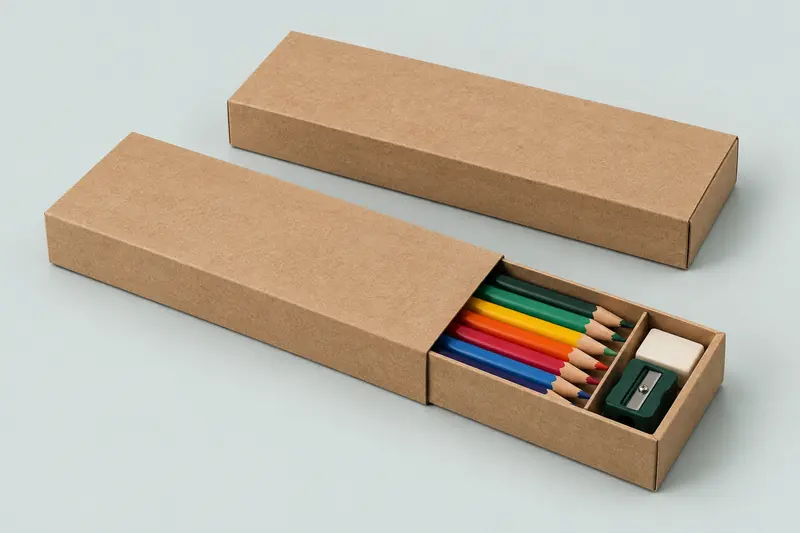
This guide explains how to make a pencil box with a sliding inner tray. The pencils sit inside the tray while a separate cardboard sleeve covers the outside. You can pull the tray out from either end or add a small ribbon tab to one side.
A sliding box is a useful choice because it does not need a complicated lid or metal hinge. Its simple rectangular structure is also easy to measure and assemble at home.
The same design can be used for school stationery, drawing pencils, craft supplies or a small handmade gift set. You can change the measurements if you need more room for markers, an eraser or a pencil sharpener.
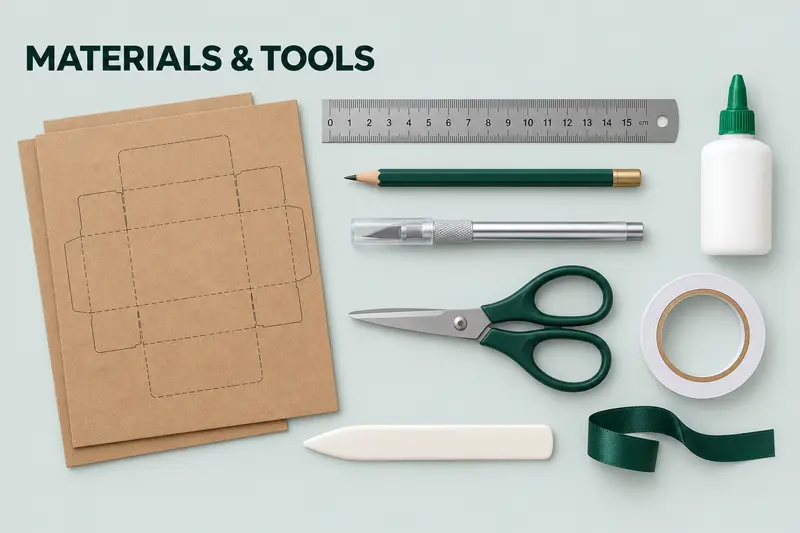
Collect your materials before cutting the cardboard. This will make the project easier and help you avoid stopping during assembly.
- Cardboard or thick paperboard
- A ruler
- A pencil for marking
- A craft knife or strong scissors
- A cutting mat or protective board
- Craft glue or double-sided tape
- A scoring tool or empty ballpoint pen
- Decorative paper or paint
- A short piece of ribbon if you want a pull tab
A metal ruler can help you make straighter cuts. Place the cardboard on a cutting mat before using a craft knife. Children should ask an adult to complete the cutting steps.
Which Cardboard Is Best for a Pencil Box?
Choose cardboard that is firm enough to keep its shape but still easy to fold. Thin paperboard from a cereal box can work for a light pencil case. It may need a second layer around the base to improve strength.
Cardboard from a clean delivery box is stronger. However, corrugated cardboard has a fluted layer that can make small folds look bulky. It is better for a larger storage box than a slim pencil box.
Mounting board or thick craft board can produce a cleaner result. These materials are useful when you want a pencil box that will be used regularly. Our paper and packaging GSM guide explains how material weight can affect the strength and feel of cardboard packaging.
| Material |
Best Use |
Things to Consider |
| Cereal box board |
Simple school craft |
Easy to fold but may feel thin |
| Craft paperboard |
Neat everyday pencil box |
Provides a smooth surface for decoration |
| Corrugated cardboard |
Large stationery storage box |
Strong but harder to fold neatly |
| Mounting board |
Firm drawer-style box |
May require separate panels instead of folds |
How Big Should a Cardboard Pencil Box Be?
A standard wooden pencil is usually about 17.5 to 19 cm long. The internal box should be slightly longer than the pencils so they are easy to place and remove.
A useful internal size for a basic pencil box is:
- Length: 21 cm
- Width: 7 cm
- Depth: 3 cm
This size can hold several pencils as well as a small eraser and sharpener. Measure your actual stationery before cutting. Coloured pencils, markers and mechanical pencils may have different lengths or thicknesses.
Place all the items together and measure their widest points. Add about 5 to 10 mm of clearance. Avoid adding too much space because the items may move around inside the finished box.
Suggested Cardboard Pencil Box Sizes
The table below provides starting measurements for several pencil box types. These are internal dimensions shown as length × width × depth. Measure the actual pencils and accessories before cutting because product dimensions can vary.
| Pencil Box Type |
Suggested Internal Size |
Suitable For |
| Slim pencil box |
20 × 4 × 2 cm |
A small group of writing pencils |
| Standard pencil box |
21 × 7 × 3 cm |
Pencils with a small eraser and sharpener |
| Coloured pencil box |
21 × 10 × 3 cm |
A larger set of coloured pencils |
| Marker storage box |
22 × 12 × 4 cm |
Markers and thicker drawing tools |
| Large stationery box |
23 × 15 × 5 cm |
Pencils, pens, rulers and accessories |
These measurements are general examples rather than fixed industry sizes. Add enough clearance for the contents and allow for the thickness of the cardboard. A box made from thick board may require slightly larger outer dimensions.
Expert tip: Make a paper version of the pencil box before cutting your cardboard. Place the pencils and other stationery inside to check the fit. This simple test can reveal sizing problems before you use your best material. Leave 5 to 10 mm of clearance so the pencils fit comfortably without moving too much.
How to Make a Pencil Box with Cardboard Step by Step
Step 1: Measure Your Pencils
Place the longest pencil on a flat surface. Measure from one end to the other. Include any eraser or decorative topper attached to the pencil.
Arrange all the items you want to store side by side. Measure the complete width and height of the group. Use these measurements to check whether the suggested 21 × 7 × 3 cm internal size will work.
Step 2: Draw the Inner Tray Template
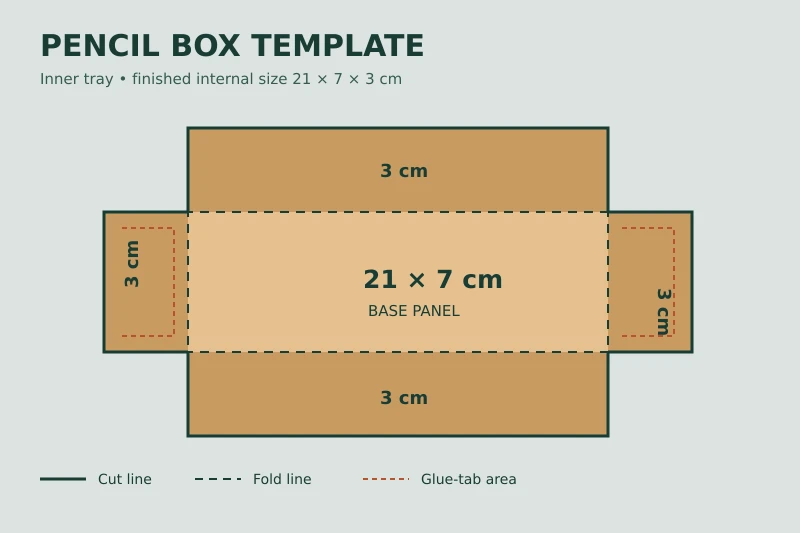
The inner tray forms the base of the pencil box. Draw a rectangle measuring 21 × 7 cm in the centre of your cardboard. This rectangle will become the bottom panel.
Add a 3 cm panel along each of the four sides. These panels will fold upwards to form the walls. Add a small glue tab at each corner if you want to join the walls with folded tabs.
Your complete tray template will measure approximately 27 × 13 cm before the corners are prepared. Mark each cutting line with a solid line. Mark each folding line with a dotted line so you do not confuse them.
Step 3: Cut Out the Tray
Place the marked cardboard on a cutting mat. Hold a metal ruler firmly against each straight cutting line. Use a craft knife to make slow and controlled cuts.
Strong scissors can be used if the board is thin. Keep the corners square because uneven corners can make the tray lean to one side.
Do not cut along the fold lines. Only remove the unwanted cardboard around the outside and make the required corner cuts.
Step 4: Score the Fold Lines
Scoring creates a shallow groove where the cardboard needs to bend. Place the ruler along one of the fold lines. Run a scoring tool or empty ballpoint pen along the line with gentle pressure.
Repeat this process for every fold. Do not press hard enough to cut through the surface. A clean score will help the side panels stand upright without cracking.
Step 5: Fold and Assemble the Inner Tray
Fold all four side panels upwards. Apply a small amount of craft glue to the corner tabs. Press each tab against the inside of the next wall.
Check that every corner forms a right angle. Hold the joins with clips until the glue begins to set. Wipe away excess adhesive before it dries.
Set the tray aside on a flat surface. Follow the drying time shown on your glue packaging.
Step 6: Make the Outer Sleeve
The sleeve must wrap around the tray without gripping it too tightly. Measure the completed tray after the glue has dried. This is more accurate than relying only on the original plan.
If the completed tray measures 7 cm wide and 3 cm deep on the outside, the sleeve needs panels for:
- The 7 cm top
- The first 3 cm side
- The 7 cm base
- The second 3 cm side
- A glue tab of about 1.5 cm
Draw these connected panels on a piece of cardboard. Make the sleeve about 21.2 cm long. The small amount of extra length prevents the ends of the tray from catching.
Add about 1 or 2 mm to the measured width and depth so the tray can slide smoothly. Thick cardboard may require slightly more clearance. Test the fit before gluing the sleeve.
Step 7: Cut and Fold the Sleeve
Cut around the outside of the sleeve template. Score the lines between the top, sides, base and glue tab.
Fold each panel along its scored line. Wrap the sleeve around the finished tray before applying glue. This dry fitting step will show whether the sleeve is too loose or too tight.
Make small adjustments if required. The tray should move smoothly but should not fall out when the box is lifted.
Step 8: Glue the Sleeve
Remove the inner tray before gluing. Apply adhesive to the narrow glue tab. Bring the opposite edge over the tab and press the join firmly.
Place the tray inside the sleeve while the glue sets. The tray will help the sleeve hold the correct rectangular shape. Take care not to let glue touch the tray.
Step 9: Add a Pull Tab
A ribbon tab can make the inner tray easier to open. Cut a short piece of ribbon and fold it in half. Glue the loose ends to the outside of one short tray wall. The folded end should extend beyond the box.
You can also cut a small half-circle thumb notch into one end of the sleeve. Draw the curve with a coin before cutting it. This opening gives your finger access to the tray.
Step 10: Let the Box Dry
Leave the completed pencil box on a flat surface until every glued section is dry. Avoid filling or decorating it while the joins are still soft.
Test the sliding action after drying. If the tray sticks, check the sleeve for bent edges or glue residue. A light press along the sleeve can help restore its shape.
How to Add a Cardboard Divider
A divider can keep pencils separate from an eraser or sharpener. Cut a strip of cardboard that matches the internal width and depth of the tray.
Fold a small tab along the bottom of the strip. Apply glue to the tab and fix it inside the tray. Position the divider near one end so the longer section still fits full-length pencils.
You can add several dividers for crayons or short drawing tools. Keep each compartment slightly larger than the items placed inside.
Simple Ways to Decorate Your Pencil Box
Decoration can hide old printing and give recycled cardboard a fresh appearance. Complete the structural work before adding most decorative elements.
Cover It with Decorative Paper
Cut coloured paper slightly larger than each visible panel. Apply a thin and even layer of glue. Smooth the paper from the centre towards the edges to reduce bubbles.
Fold the paper neatly around exposed edges. Avoid covering areas where the inner tray slides against the sleeve.
Paint the Surface
Acrylic paint can work on many types of cardboard. Apply a light first coat and allow it to dry. Heavy wet coats may cause thin board to curl.
You can create simple stripes, dots or geometric patterns. Place scrap paper inside the tray to keep the interior clean while painting.
Add a Name or Label
Write the owner’s name on a small paper label. Attach it to the top or one side of the sleeve. Stickers and letter stamps are also easy options.
If the box will hold drawing supplies, label each compartment by pencil type or colour group.
Use Recycled Materials
Old maps, wrapping paper and magazine pages can create an interesting surface. Choose clean materials that are not oily or damp. Flatten folded paper before attaching it to the cardboard.
How to Make the Pencil Box Stronger
A handmade box can weaken around its corners and opening after regular use. A few small changes can improve its strength.
- Glue a second cardboard panel under the tray base.
- Cover exposed edges with paper tape.
- Use smaller amounts of glue to prevent warping.
- Keep the grain or flute direction consistent across matching panels.
- Allow every join to dry before testing the box.
- Use thicker board for heavy markers or large stationery sets.
A thin decorative paper wrap can also support the outside surface. It will not make weak cardboard rigid but it may reduce light scuffing during normal use.
Common Mistakes to Avoid
Making the Box Too Short
Measure the longest item rather than using an average pencil length. Add a small allowance so the pencil tips do not press against the end wall.
Forgetting the Thickness of the Cardboard
Thick cardboard takes up space when it is folded. The outer sleeve may need a few extra millimetres to slide over the tray properly.
Using Too Much Glue
Excess glue can soak into paperboard and create waves. Apply a thin layer and hold the pieces together while it sets.
Cutting the Fold Lines
Fold lines should be scored rather than cut. A deep cut can separate the side panel from the base.
Decorating Before Testing the Fit
Paint and glued paper can change the thickness of the parts. Assemble and test the plain box first. Add decoration after the drawer moves correctly.
Closing the Box Before It Is Dry
Wet glue may attach the tray to the sleeve. Let both parts dry separately before leaving the pencil box closed.
Can You Make a Pencil Box Without a Sliding Drawer?
Yes. A basic reverse tuck end box is another option. This style uses one folded piece of paperboard with flaps at both ends. It looks similar to the cartons commonly used for retail pencils.
A tuck-end carton requires more accurate flap measurements than a sliding box. The tabs need enough room to close without pushing against the pencils. It is a useful design if you want the finished box to fold flat before use.
You can also make a hinged-lid version from separate cardboard panels. Join the lid and base with strong paper or bookbinding tape. This method works well with thick mounting board that cannot be folded easily.
Handmade and Professionally Made Pencil Boxes
A DIY cardboard pencil box is suitable for a school activity, home storage or handmade gift. Each box can be created from available materials and decorated by hand.
Retail packaging has different requirements. A business may need hundreds of boxes with consistent dimensions and printed branding. The packaging may also require accurate folds, secure closures, inserts or a display window.
| Feature |
Handmade Pencil Box |
Custom Retail Packaging |
| Main use |
Craft or personal storage |
Packing and presenting products |
| Quantity |
Usually one or a few boxes |
Small or wholesale production runs |
| Printing |
Hand-painted or paper decoration |
Professional artwork and brand colours |
| Sizing |
Measured and cut by hand |
Made with a production dieline |
| Optional features |
Simple dividers and labels |
Inserts, windows and printed finishes |
If you sell pencils or stationery, professionally produced cardboard pencil boxes can provide consistent sizing and a cleaner retail presentation. They can be manufactured around the exact pencil dimensions and printed with your supplied logo or artwork.
Make Your Own Cardboard Pencil Box
Learning how to make a pencil box with cardboard starts with careful measurements and clean folds. Build the inner tray first. Test it inside the outer sleeve before adding decoration. A little extra time spent on scoring and drying can produce a box that opens smoothly and keeps stationery organised.
A handmade version is an enjoyable choice for crafts and home storage. Businesses that need branded retail packaging can order custom sizes, printed artwork and fitted inserts from Fine Packaging. Contact us at support@finepackaging.com.au for free quotes on custom pencil boxes with free shipping across Australia.
Frequently Asked Questions
Can I make a pencil box from a cereal box?
Yes. Cereal box board is easy to cut and fold. It works best for a lightweight pencil box. Consider gluing two layers together if the material feels too flexible.
What size cardboard pencil box fits standard pencils?
An internal length of about 21 cm will fit most standard wooden pencils. A width of 7 cm and depth of 3 cm provide space for several pencils plus a small eraser or sharpener. Measure your own items before preparing the template.
What glue should I use for a cardboard pencil box?
PVA craft glue works for many types of paperboard. Double-sided tape can provide a cleaner join on thin decorative board. Hot glue may work on thick cardboard but should be used carefully because it can create bulky corners.
How can I cut cardboard neatly?
Place the material on a cutting mat and use a sharp craft knife with a metal ruler. Make several light passes instead of forcing the blade through in one movement. Ask an adult to handle the knife when children are completing the project.
How do I stop the sliding tray from getting stuck?
Leave about 1 or 2 mm of clearance between the tray and outer sleeve. Test the fit before gluing the sleeve. Check that the tray corners are square and remove any dried glue from the sliding surfaces.
Can I add a window to a homemade pencil box?
Yes. Cut the window opening before assembling the sleeve. A piece of clear recycled plastic can be glued behind the opening. Keep enough cardboard around the window to support the box.
Can this project use recyclable materials?
You can reuse clean cardboard and paper from suitable household packaging. Recycling options for the finished box depend on the glue, paint, plastic window and decorations you add. Check the requirements of your local recycling service.